Here is a step-by-step guide of dehydrating cherries in the food dehydrator.
Dried cherries are excellent snacks and pastry garnish. Thanks to the cheap food dehydrator being sold nowadays, everybody can dehydrate cherries in their own home without spending a thousand bucks and relying too much on traditional and lengthy food drying methods.
READ ALSO: Which Food Dehydrator is Right for You
Dehydrating Cherries – Steps You Need to Take
Step 1: Picking cherries for dehydrating
You have three choices. Pick the best for dehydrating cherries. Pick the best and eat them. Or just dehydrate the whole batch.
Take note of the qualities you should look for when picking the best cherries from your batch.
- Good and fresh cherries should have green stems.
- Their color should be deep mahogany or bright red. The color depends on the variety you bought. Rule of thumb is not to get any pale ones.
- The best cherries are pristine. They do not have bruising and soft spots. They should be firm when you feel them.
- They also should not have any sign of pitting. They should not have insect damage.
If you have not bought anything yet sample them. Excellent cherries should be sweet since they hold a good amount of sugar.
If the store does not allow you to sample a cherry then judge the taste through their color. Darker colored cherries are often sweet.
If the cherries you are checking do not have any stems, consume or dehydrate them immediately. Removing stems from cherries or most fruits reduces their shelf life a lot.
If you plan to store the cherries, do not wash them. Place them in a bag, and put the bag in the fridge. Before consuming or dehydrating cherries, let them sit in room temperature for fifteen minutes to half an hour.
Step 2: Washing the cherries
Get your cherries and wash them. You do not need to do anything special. Just treat them as regular fruits and vegetables.
If you really want to wash them good, then do so. A great way to clean those cherries nice and shiny is to use vinegar and baking soda. However, do not mix them together or with water.
It is an urban myth that vinegar and baking soda solution is the ultimate natural cleanser. Mixing the two only counteracts each other and starts a chemical reaction that neutralizes the effectiveness of the two ingredients.
So, why suggest it? There is a much more effective method to use them as a cherry wash. You need to use them alternatively with water.
- Spray the vegetables, fruits, or cherries with vinegar.
- Rinse the cherries with warm water.
- Sprinkle baking soda on them.
- Rinse the cherries again with cold water.
- Soak them in lukewarm water for a few minutes.
- Place the cherries on top of a dry towel.
- Leave them to air dry.
Step 3: Pitting the cherries
You can either do this manually by hand or take advantage of pitters. There are three popular methods of removing the pit inside a cherry. Regardless of the method you choose, you will start with these steps.
- Prepare your kitchen. Ready your bowls. One for the processed cherries. And another for the pits.
- Do not forget to wear an apron and set aside some towels. Handling cherries is a messy business because of their juice stains.
- Get your knife (a cleaver is preferred) for method one. Get a paring knife for method two. Get a chopstick for method three.
Method 1
Place a cherry on top of your cutting board.
Press the side of the knife on the cherry to make it break or pop.
Pry open the cherry and remove the pit.
Method 2
Rock a paring knife around the cherry as if you are pitting an avocado.
Twist the cherry to make it break or pop in two.
Remove the pit.
Method 3
Remove the stems of the cherries if you have not done it yet.
Push the pointy end of a chopstick dead center into the cherry.
Push the pit out using the flat end of the chopstick once you feel the stick reached the pit.
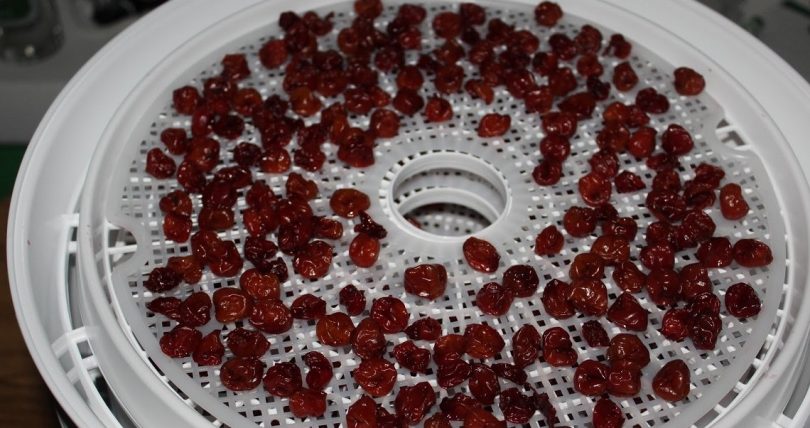
Step 4: Placing them on the dehydrating tray
Cut the cherries in halves if you chose to perform method 1 and 3 or used a pitter. Make sure that you clean your tray before you place the cherries.
When placing the cherries on the tray, make sure that the cut side faces up. Making them face down will only let the cherries’ juices drip on the food dehydrator and tray.
The amount of cherries you can place on the tray depends on your preference and the capacity of the dehydrator.
The rule of thumb here is that the cherries should only touch lightly if you want to maximize the tray’s space. You do not need to worry about crowding the tray too much since the cherries will shrink a lot during the dehydration process.
Placing an additional dehydrator sheet is advisable to lessen the mess that the juices will cause. If the tray gets too sticky or stained, soak it in warm soapy water after the dehydration process is completed.
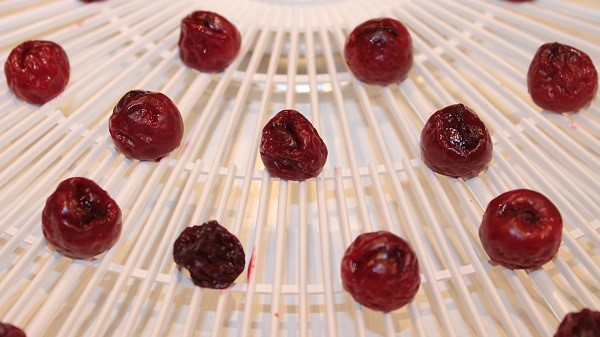
Step 5: Dehydrating cherries in the food dehydrator
Dehydrating cherries requires 125° F to 135° F of heat from your dehydrator. The amount of time depends on your preference and state of the cherries. Humidity also plays a huge factor.
The recommended duration is 12 to 24 hours with halved cherries. Do not hesitate to check the state of the cherries after every 4 hours.
Remember that you should not under- and over-dehydrate cherries. Over-dehydrating will make the cherries too hard. Under-dehydrating cherries will make them less flavorful than you hope them to be.
Step 6: Storing the dried cherries
Clean and sterilize a mason jar. You can place the dried cherries in it immediately or prep them first. You can alternatively use a zip lock bag.
Prepping the dried cherries depend on how you will use them later. Cutting the halves in half once more makes them an ideal snack.
Powdering or grounding the cherries makes them excellent for shakes and flavoring. It also allows you to store more without using too much space.
Place the container full of dried cherries inside the freezer. The low temperature will kill off unwanted bacteria on them. Two weeks are enough to ensure that the cherries are cold-pasteurized enough.