Ginger (Zingiber officinale) is a flowering plant that belongs to the family Zingiberaceae. It’s an herb that possesses a distinct and strong flavor. The rhizome, or ginger root is well-known for its culinary and medicinal uses.
More importantly, ginger contains gingerol, a phenolic compound that has anti-inflammatory and antioxidant properties. It is also a good source of Vitamin C, potassium and magnesium. These nutrients are essential for bone and heart health. Ginger can help relieve nausea, vomiting, and headache. It also aids in digestion and helps cure diarrhea. Furthermore, it’s used to treat respiratory disorders like asthma.
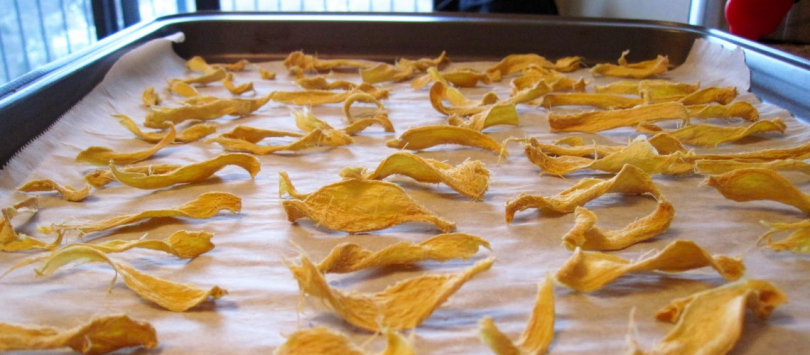
With those perks, it’s no wonder that many spend time dehydrating ginger. Dehydration is the process of removing water and moisture. It is one of the most widely-used methods of food preservation. Dehydration stops the growth of bacteria, yeast, and mold that cause food spoilage. This process also helps keep nutrients intact.
Easy Methods of Dehydrating Ginger
Dehydrating ginger can be done at home through several easy methods.
Dehydrating ginger in the food dehydrator
This is the most efficient method of ginger dehydration. A food dehydrator has a good air circulation for better drying.
STEPS:
- Wash the rhizomes or the ginger roots carefully.
- Peel the rhizomes using a peeler or a paring knife.
- Slice the ginger into thin pieces (about 1/8-inch thick).
- Lay the slices on the dehydrator tray. To ensure uniform dehydration, make sure they don’t touch each other.
- Set the machine to 135°F and dehydrate for 3-4 hours.
- Take one out and check if for brittleness. If it breaks easily when bent, it is ready.
- Let it cool for 5-10 minutes.
Store the dried ginger slices in Ziploc bags or airtight containers. Place them in a dry and well-ventilated room.
READ ALSO: Which Food Dehydrator is Right for You
Dehydrating ginger in the microwave
This one’s the fastest and easiest method of food dehydration.
STEPS:
- Wash the rhizomes or the ginger roots under cool, running water.
- Peel the rhizomes (to protect your hands, use kitchen gloves).
- Make thin horizontal or vertical slices of the same size.
- Arrange them on the microwave tray or put them in a microwave-safe bowl. Provide space between slices for better air circulation.
- Microwave for approximately 1 ½ minutes. It should be as crisp as a potato chip. Keep constant eye on the ginger to avoid over-drying.
Store in a sealed plastic container or a sealed jar. Place it somewhere dry, well ventilated, and dark.
Dehydrating ginger in the oven
Ovens remove the water and moisture slowly. Also, they do not have built-in fans for better air movement.
STEPS:
- Thoroughly wash the rhizomes or the ginger roots.
- Remove the skin with a knife or peeler.
- Make thin slices that are roughly of the same size.
- Arrange the slices on the oven tray. For even drying, make sure that there is enough space between the slices.
- Set the oven to lowest possible temperature.
- Leave the oven door slightly open. Place a fan in front of the oven to improve air circulation.
- Bake the ginger for 10 to 15 hours, turning slices over every 3 hours.
- Check if they are ready. Take one out and break it. If it breaks easily, it is ready.
Put the dried slices in glass jars or any airtight container. Keep them in a dry, cool, and dark place.
Sun drying ginger
Using the natural heat of the sun to dehydrate food is the oldest method of drying. Sun-drying needs direct sunlight, low humidity, and high temperature.
STEPS:
- Rinse the rhizomes or the ginger roots with cool, clean water.
- Peel all the pieces with your kitchen tool of choice.
- Make thin slices. Try to keep them as similarly sized as possible.
- Clean the drying tray. Then cover it with a clean cloth. This will absorb the moisture during the drying process.
- Put the slices on the drying tray. Again, you need to space them out evenly.
- Cover the tray with clear glass. This will speed up the drying process. This will also keep bugs and other insects away.
- Bring the tray outside. Make sure the ginger gets 6-7 hours of direct sunlight daily. The outside temperature should be 90°F or higher. Do not sun dry when the weather is humid.
- Allow it to dry for 1-2 days. For best results, occasionally check and turn the slices every 2 hours. Bring the try inside at night or whenever it’s raining.
- Check for brittleness to see whether the ginger is ready for storage.
Store the dried ginger slices in an airtight container. You may also use glass jars. A dry and well-ventilated room remains the best place in which to keep your dried ginger.
Freeze dehydrating/freeze drying (using a freezer)
This method is also called lyophilization. It allows moisture to escape using a freezing and/or below-freezing temperature.
STEPS:
- Wash the rhizomes or the ginger roots carefully.
- Peel the rhizomes with a knife or peeler. Consider wearing kitchen gloves if you’re not that confident about handling such tools.
- Make thin horizontal or vertical slices. Making sure that the slices are of approximately the same size allows for even drying.
- Place the slices evenly on a freezer tray. Don’t let them overlap.
- Cover the tray with a clean cloth or aluminum foil.
- Put the tray in the freezer. The freeze-drying process typically lasts for 1-2 weeks.
- Check if they are finally frozen solid. The pieces should easily snap when held firmly.
Store them in vapor-proof freezer cartons or heavy-duty freezer bags. They can stay in the freezer up to one year.
Ginger is a spice that contains a lot of helpful nutrients and phytochemicals. And unless you have a limitless supply of fresh ginger ready for use, dehydrating ginger is necessary to benefit from these nutrients all year round.
As you have learned, dehydration is a simple technique of food preservation—and is in most cases, it is the easiest option. To dehydrate ginger effectively, follow the steps for each method as provided above. There’s no need to worry about making mistakes. And even if you do commit a few, drying should still be a fun learning experience.