Oranges can be consumed in many different ways. You can add them to your salad or use them to make an orange lemonade. You can put some orange slices in your oatmeal too. You can also try dehydrating oranges and have them as travel snacks.
Fruits are mostly made up of water. During dehydration, you’re removing the water and moisture from the fruit to preserve it. The process prevents microorganisms like molds, yeast, and bacteria from growing.
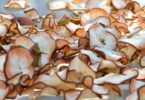
You can dehydrate oranges using an oven, a dehydrator or you can sun-dry them.
A Guide to Dehydrating Oranges
How to prepare oranges for dehydration
Make sure you have the everything you need before you are starting the process of dehydrating oranges. What you’ll need:
- Oranges
- Fruit and vegetable wash
- Water
- Clean cloth or dish towel
- Sharp knife
- Vegetable peeler or zester
- Parchment paper
- Baking sheet
- Greaseproof or baking paper
- Airtight glass or plastic containers
- Sugar
- Aluminum foil or tin sheet
- Plastic tray, stainless steel mesh or Teflon-coated fiberglass
- Cheesecloth
Rinse the fruit under cool, flowing water. You may use a fruit and vegetable wash for more thorough cleaning.
Dry the oranges using a clean cloth.
With the peel on, slice them into ¼ inch thick rings. The thinner the slices, the better. But try to slice them into equal sizes. This will ensure that the slices would dry simultaneously.
Remove the seeds, if any.
If you plan to sun-dry orange peels, choose the ones with a thin peel. You may opt for tangerines or Mandarin oranges.
To prepare the fruit for sun-drying, wash it with water and dry it with a clean cloth.
Peel the fruit with a sharp knife, a swivel head vegetable peeler or a zester.
Peel the orange skin into long strips from top to bottom. Try not to peel the white part under the skin because it’s bitter.
How to sun-dry orange peels
- Put a greaseproof or baking paper on the drying tray. You may use a plastic tray, stainless steel mesh or Teflon-coated fiberglass.
- Place the peels on a greaseproof or baking paper. Make sure they don’t overlap.
- Protect the tray with a fly cover and place it under direct sunlight.
- Place an aluminum foil or tin sheet under the tray. This will help improve the drying process. You may also put the rack on a hot concrete driveway. Make sure the rack is elevated enough. It should not be easily accessible to animals or young kids.
- Place cheesecloth on top of the peels. This will allow the sunlight in while protecting the peels from insects or birds. Secure the edges of the cheesecloth under the try so it’s not easily removed.
Drying process could take about 6 hours or up to 3 days. A sun-dried orange peel is brittle and hard. Keep the peels inside at night then take them out again once the sun is out.
With proper storage, sun-dried orange peels can last for years. The flavor and aroma get better as the peels age. You can use sun-dried oranges in scones, muffins, cakes, and cookies. You may also use them in curries, stews, marinades, sauces, and sugars. Some even hang them inside their house as Christmas decors.
Dehydrating oranges using a dehydrator
- Place the slices in one layer on the dehydrator tray. It’s important that there’s no overlap to ensure even dehydration.
- Use the recommended time and temperature found in the user manual. If there’s none, set the heat to 110 degrees Fahrenheit (43 degrees Celsius).
- You might need to dry oranges from 12 to 48 hours depending on the size and quantity of the fruit slices.
Check the slices every two hours and flip them over to ensure both sides are properly dried. They are dehydrated enough if the slices are brittle, transparent, and without any moisture.
READ ALSO: Which Food Dehydrator is Right for You
Dehydrating oranges using the oven
If you haven’t invested in a dehydrator yet, oven-drying is a good option. But you’ll need to think of the electric consumption. Also, ensure that your oven is durable enough since you’ll use it for long hours.
- Pre-heat your oven to 200 degrees Fahrenheit (93 degrees Celsius).
- Use dry dish towels to remove some juice. To do this, place the slices on a dish towel. Put another dish towel on top then press the towels gently.
- If you want a sweetened dried orange, dip a side of each slice in sugar.
- Place a parchment paper on your baking sheet. Place the slices in one layer on the baking sheet.
Drying process could take about 12 hours. If you like them chewy, you may dry them for three hours. Keep an eye on them every two hours to avoid overcooking or burning them.
You may opt to leave the oven door slightly open. Place the oven in a safe place that is unreachable to kids or house pets.
How to Store Dried Oranges
- Cool the dried slices for an hour.
- Store the dried oranges in an airtight glass or plastic container.
- To maintain freshness, use a vacuum sealing machine to store them in jars or plastics with a tight lid.
- If you made semi-dehydrated oranges or the ones with some juice on it, use an airtight container to store the slices. Place a wax paper in between the layers of slices.
- Put them in a cool, dark place.
READ ALSO: How to Store Dried Fruits at Home
Dehydrated oranges can be stored for two years. If you find any moisture in the container after a few days of storage, place the slices back into the dehydrator for a few more hours.
If you see some molds, you can recycle them and add them to your compost.
Dehydrated oranges can be used for quick snacks and orange tea. You can also powderize them and add them to stews, soups or baked goods.
Oranges are good for the immune system and the skin. They’re also known to be good for the heart and maintaining cholesterol levels. They may help reduce the risk of respiratory illnesses, ulcers, and certain cancers.
Apart from the health benefits, dehydrating oranges allow you to buy the fruit in bulk at low cost, dry them and save them for later. You can also sell them if you’re business-minded. More importantly, you’ll be able to enjoy healthy food especially if you grow them.