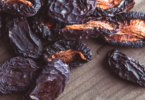
Dehydrated pears are the best alternative to snacks such as chips and cookies. You can also store them for future use such as for cereals and pies. You can also keep them handy for emergencies. Better yet, keep them in small containers and they make a healthy snack for you and your whole family!
Dried pears can also substitute pineapples on pizza. You can also use them in the place of raisins or cranberries in muffins, granola bars, bread and cakes. You can also soak them in fruit juice, sherry or wine for a refreshing drink.
Here are some tips to help you prepare dehydrated pears in your home.
Different Methods of Dehydrating Pears at Home
How to prepare pears for drying
Before you dehydrate your pears, it is crucial that you prepare them well to ensure nutritious, yummy, and long-lasting dried pears.
1. Choosing or picking your pears
Choose pears that are slightly under-ripe. Don’t worry if they are not that sweet, they will get sweeter once dehydrated. They are ready for picking when the color has turned to deep lime green and not yellow. After a week of being plucked from the trees, the pears will ripen and turn yellow.
When you purchase pears from the local farmers market, choose those that are still green then store them in a cool, dry spot for a week to ripen.
2. Cleaning or washing the pears
Once you have picked or bought the pears, do not wash them just yet. A protective coating on the pears keeps them fresh. Wash the pears thoroughly with running water just before you are ready to slice them.
3. Slicing and coring the pears
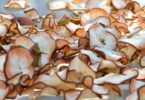
It is unnecessary to peel the pears. The peels added extra fiber and are as tasty as peeled pears. Use a paring knife to the core and seeds. Remove blemishes, brown spots, or wormholes. Slice them into ½-inch or ¼-inch thick slices. The thinner the slices, the faster they get dehydrated.
4. Dip in an acidulated wash
Dropping them in an acidulated wash is an antioxidant treatment that prevents them from browning while being dried. You can use 1 ½ tablespoon of lemon juice or vinegar mixed in a quart of water. Soak the slices until you are done slicing the rest of the pears.
5. Dehydrate the pears
Remove the pears from the acidulated wash and drain them on a drying rack or paper towels before dehydrating them.
How to dehydrate pears at home – the step-by-step guides
Now that you have prepared the pears, you are now ready to dehydrate them. Here are different ways that you can dehydrate your pears.
Dehydrating pears in the food dehydrator
- Prepare and slice the pears as mentioned above.
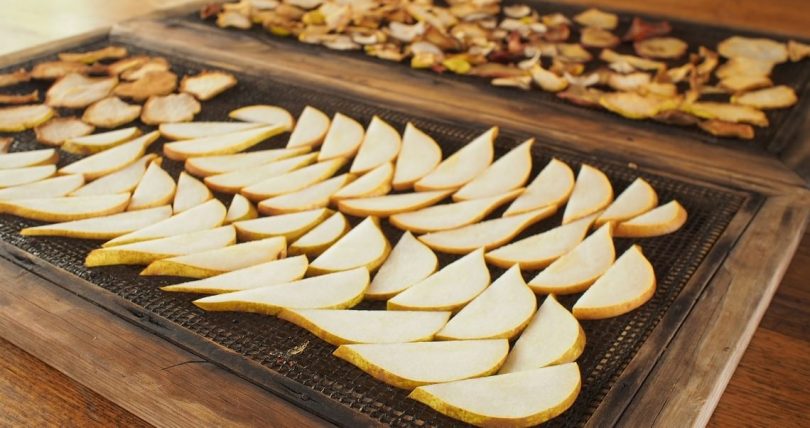
- Arrange the pear slices on the food dehydrator trays. Be careful that they don’t overlap or touch each other.
- Preheat the food dehydrator to 160 degrees Fahrenheit. Lower the temperature to 140 degrees and dry your pears for 6 to 18 hours.
- Halfway through the drying process, switch the positions of the trays and turn them around to even out the drying process.
- If you notice that the sugar in the pears starts to caramelize during the process reduce the heat to dry them at a slower rate.
- After they have been dehydrated, let them cool to room temperature.
Test if they have adequately dried by breaking a piece in half. If the chip is crisp and breaks cleanly, it is completely dried. If they are still squishy and moist, return them to the dehydrator and dry them for another 1 or 2 hours.
Condition the pears by placing them in a glass jar. The jar should only be 2/3 full, so you can shake them properly. In a week, shake the jar a couple of times to redistribute the fruit and remove excess moisture. When condensation shows up, return them to the dehydrator for an hour or two using the lowest temperature.
READ ALSO: Which Food Dehydrator is Right for You
Dehydrating pears in the oven
- Cleanse, prepare and slice your pears as outlined above then drain them well.
- Preheat the oven to 140 to 160 degrees.
- Arrange the sliced pears on a cookie tray lined with parchment paper. Ensure that the slices do not touch each other or overlap.
- Place the trays inside the oven.
- Leave the oven door open a bit to let the air circulate and hasten the drying process.
- Set the oven temperature to the lowest setting, about 140 degrees.
- After an hour, switch the position of the trays and turn them around.
- Dehydrating pears in the oven takes 3 to 6 hours. Make sure to check on them every 1 or 2 hours, so they don’t get scorched.
A convection oven is best for dehydrating pears because it prevents the formation of bacteria and slows down the food enzymes.
Using sunlight to dehydrate pears
- Prepare, cleanse and slice the pears as usual.
- Prepare your food trays lined with parchment paper and a storage area with a wire mesh.
- Start early in the day and make sure that they are directly exposed to the sun. Use a wire mesh to prevent dirt and insects from contaminating the pear slices.
- Solar drying takes about 3 days and is an economical way to dry your pears.
- When the sun is about to set, bring your pear slices inside and place them in a cool, dry place to protect them from moisture. Bring them out into the sun the next day.
- Turn the pieces around on the next day to even out the drying process.
Some pieces may dry faster than the rest. After conditioning the pieces, return any slices to dry in the sun to prevent them from rotting.
Storing your Dehydrated Pears
Storing your dehydrated pears properly ensure that they last longer and still keep their delicious taste and nutritional value. Here are some tips to store your pears.
- Store them in airtight glass containers. Using glass containers makes the pear slices visible and you can check for any moisture or signs of browning.
- You can also use freezer bags or a plastic container.
- You can store them in the freezer in freezer-safe containers if you want moist and juicy pears. Storing them in the freezer also prevents molds.
Dehydrated pears can last 6 to 12 months if dried and stored properly.