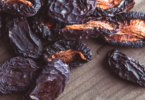
Drying cherries is one of the best ways to preserve the fruit.
Dried cherries last long. They remain tart and sweet. They retain their rich and vibrant red color. Dried cherries hold their shape. They don’t get soggy. They are versatile. Dried cherries are a delicious and healthy addition to any diet. They are high in fiber. They are rich in antioxidants. Research shows that dried cherries help prevent health conditions like muscle pain, arthritis, osteoporosis, and stroke.
Dried cherries have a sweet tangy taste. They are a winning substitute for chips, crackers, artificially flavored yogurt, and other processed snacks.
You can use dried cherries in a variety of ways. You can use them in compotes. You can use them as salad toppings. You can use them in baked goods. You can use them as snacks to slake hunger pangs.
READ ALSO: 15 Health Benefits of Dried Cherries
How to Make Dried Cherries – Easy Methods for Drying Cherries
There are 3 methods for drying cherries at home.
Drying cherries in the oven
You can use the oven for drying cherries. This method is a simple and easy way to dry cherries.
- Give the cherries a good wash. Put them in a colander to drain.
- Take the stems out and throw them away.
- Pit the fruit.
You can make this task easier by using a cherry pitter. You can also design your own DIY cherry pitter.
Bottle pitter
You can use a wine or beer bottle for this. Rest a cherry (with its stem end up) on the lip of the bottle.
Get a chopstick and use that to punch a small hole in the center of the cherry. This will punch the pit out of the cherry and fling it inside the bottle. The fruit will remain where it is.
Get another cherry and repeat the procedure.
Drinking straw pitter
Hold a cherry steady between your forefinger and your thumb. The stem end of the fruit should face up.
Get a plastic straw. Use that to punch out the cherry’s pit. The pit will go inside the straw.
Get another cherry and repeat the procedure. You can empty the straw as needed or get a new straw.
Paring knife
You can also cut the cherries in half with a paring knife. Remove the pit. Pat the cherries dry using a paper towel.
- Pre-heat your oven. Use the 170 or 200-degree setting. (Use the lowest setting of your oven).
- Get a baking sheet and line it with Silpat or parchment paper.
- Arrange the cherries on the baking sheet in such a way that they don’t touch each other. If you are using cut cherries, put them on the tray with their cut sides up.
- Bake for about 6 to 9 hours or until the cherries look wrinkled and a bit leathery. Halved cherries will dry out faster than whole cherries so check them out once in a while.
Drying cherries in the food dehydrator
A food dehydrator uses air flow and heat to reduce the water content of cherries and dry them effectively.
- Wash the cherries well.
- Remove the stems.
- Remove the pits.
- Put the prepared cherries on trays. The cherries should not overlap. There should be ample space between them.
- Preheat the dehydrator to 165 degrees Fahrenheit. (Use the highest setting).
- Put the tray inside the dehydrator. Leave the cherries to dry for 2 or 3 hours.
- Lower the heat to 135 degrees. Continue drying the cherries at this temperature for another 8 to 15 hours.
- Cherries dry at different rates based on their size and thickness. Check the cherries once in a while.
Take the cherries out of the dehydrator if they feel completely dry. They should be just a bit supple to the touch and leathery in appearance. Allow the dried cherries to cool completely before storing them.
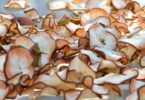
Sun drying cherries
Drying cherries by using the sun drying method may take longer than when you dry them using an oven or a food dehydrator. However, it is a much cheaper method. You don’t need to buy special equipment or spend on electricity.
It is important to dry your cherries during warm and sunny days. A pleasant breeze will make the cherries dry faster.
- Wash, de-stem, and pit the cherries as you would in the first two methods.
- Put the cherries on cooling racks so that the air can course around the cherries freely.
- Set the racks on cookie sheets.
- Get a clean cheesecloth and put it loosely on top of the racks. This will keep bugs off the cherries.
- Look for a warm, dry, and sunny spot for drying the cherries.
- Turn the cherries every now and then so that all sides dry evenly.
- Remember to take the trays inside at night. Return them back to dry under the sun the next day.
- The cherries should dry nicely within 3 to 4 days.
Conditioning Dried Cherries
Even if you dry the cherries at the correct temperature and duration, the fruit may still have some residual moisture in it. This does not mean that the fruit is not adequately preserved. However, the dried cherries are likely to taste better if you let them go through a simple conditioning process.
After cooling the cherries completely, put them in glass jars. Fill the jars only two-thirds of the way. Cover the jars with screw-on caps.
Shake the jars twice or thrice a day. This should rearrange the cherries and redistribute any moisture that may still be present. Do this for a week.
If you notice any condensation, you may have to return the cherries to the oven or food dehydrator to dry them out for a few more hours.
Storing Dried Cherries
Dried fruit will last longer if you store them properly.
After drying and conditioning your cherries, put them in airtight containers. It is better to use containers with screw-tops. The tight lids will keep the cherries safe from air, moisture, and other contaminants.
Keep the containers in a cool dry area. Keep them away from sunlight and direct heat.
If you have a lot of dried cherries and want to keep them for a longer period, you can store them in your freezer. You can use vacuum-sealed freezer bags for this purpose.
Some foods are prone to develop freezer burn. Dried cherries, however, freeze really well.
READ ALSO: How to Store Dried Fruits at Home