Nowadays, herbal medicines are becoming even more popular because they’re safer than conventional medications. Many people are avoiding chemical-based substances given their healthy lifestyles. With this, medicinal herbs are becoming sought after and given a lot of consideration. One of these plants is elderberry which is said to help treat and improve various conditions.
One of the best ways to preserve and consume elderberries afterward is by drying them.
Beginner-Friendly Methods of Drying Elderberries
Prepping elderberries for drying
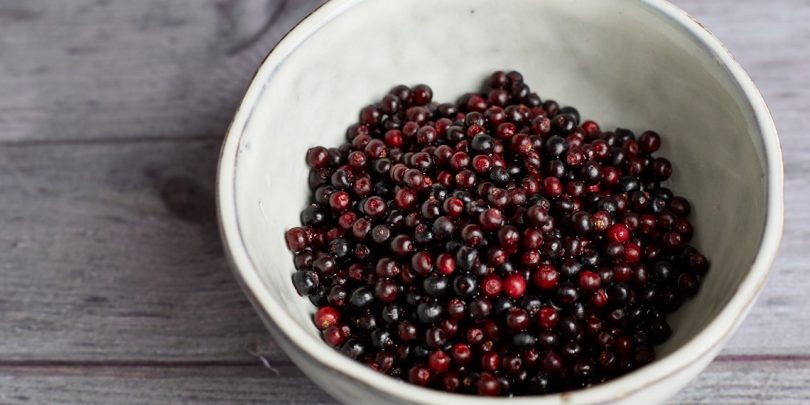
Be sure to pick the ripe ones because the unripe ones could make you sick. You know they’re ripe when they turn deep purple to black and unripe when they are green and pale purple.
Elderberries are not very hard to harvest — you can use kitchen scissors to do so. Do not forget to bring a plastic bag with you to collect the berries.
After picking out the ripe ones, bear in mind that these herbs have a short life, so they need to be preserved. If you do not plan on doing anything with them yet, be sure to keep them in the refrigerator first.
When they’re ready for drying, place them in a clean container. Remember to remove all the unnecessary parts like the leaves and flowers. Make sure to do this as gently as possible to prevent any spoilage.
Wash the berries with clean water. Gently rinse every berry. Then, leave them on paper towels or use a strainer to remove excess water.
There are various ways to dry elderberries. You can do it under the sun, with a dehydrator, or with an oven. All three methods are effective but vary in terms of drying time.
Sun-drying elderberries
This method is pretty easy and straightforward.
Here’s how:
- Place the elderberries in a container and cover to prevent insects or birds from eating or infesting them. Note that your cover or lid must allow sunlight to pass through, so opaque ones are out of the question. The berries should also be evenly spread out so that they will all be dried equally.
- Make sure that the drying area is far away from dust and dirt but is in a position to receive direct sunlight.
- Leave the elderberries to dry. It usually takes three days, but drying time can be longer or shorter depending on the weather.
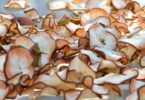
For sun-drying elderberries, it is best to do so during summer. A great way to check if the berries are dry enough is to pinch them and see if they are still moist. If they feel soft and moist, leave them for a while again so they can dry further. They will look like raisins when they are successfully dried.
Drying elderberries in the food dehydrator
This method usually takes 4 to 5 hours. If you have a dehydrator and don’t have the time to wait for the elderberries to dry, this is your best option.
- Place the elderberries in a clean container or a dehydrator tray.
- Set the dehydrator to 135 degrees Fahrenheit (57 degrees Celsius), but the temp may vary with your dehydrator, so check the instructions on how to dry fruits just to be sure.
- Double-check if the elderberries are dry enough by pinching them.
Among the three drying methods, this one is the fastest so if you plan on drying elderberries and other plants often, invest in a good dehydrator.
READ ALSO: Which Food Dehydrator is Right for You
Drying elderberries in the oven
This method could be executed in two ways: letting them sit in the oven to dry or using the leftover heat from the oven.
To let the oven do all the work:
- Preheat oven for 3 minutes. The temperature should be 115 degrees Fahrenheit (46 degrees Celsius) or below. Make sure to set the right temperature — elderberries are quite delicate and you would not want to spoil them.
- Place the elderberries on a baking tray lined with a cookie sheet and slide inside the oven to dry. Waiting time is around 15 to 30 minutes.
- From time to time, check if they are being dried properly to prevent overcooking.
- Once dry, take out the berries and leave to cool.
If you’ll be using leftover heat, just slide the tray of elderberries into the oven after cooking/baking and leave them there to dry. While this is more energy-efficient, note that it is also more time-consuming — the drying process can last for several days.
How to store dried elderberries
Storing dried elderberries is crucial because they could spoil easily just like other herbal medicines. But if done properly, you’ll be able to reap the many health benefits of dried elderberries.
After drying, collect the elderberries, leave them to cool, and keep them in a glass container or jar.
Make sure that the container or jar is tightly sealed.
Store the container or jar in a cool place, such as in your cupboard or kitchen drawers. Make sure to keep them away from light and preserve the freshness of the elderberries.
It is important that the steps be followed in storing dried elderberries. Otherwise, the elderberries might grow molds.
Indeed, elderberries could help people in numerous ways — boosting the immune system, protection from allergies and bacteria, better skin, improved heart health, and more. It is a great all-natural alternative if you want to do away with over-the-counter medications. As long as you properly follow the right steps on storing and drying elderberries, you can have a handy, go-to elderberry solution in your home whenever the need arises.
Image: Great British Chefs