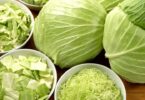
Kale is part of the cabbage family. It’s known for its curly leaves that are packed with nutrients. It’s also gaining popularity because it’s easy to grow at any time of the year so long as it’s not winter.
Whether it’s in salads, pizza, soups, noodles, smoothies, or even chips, this veggie can be used in many ways to the extent that it’s considered a superfood. So in case you have kale growing in your garden, you’ll be happy to know that it will continue growing as long as you keep picking its leaves, providing you with an endless supply of its healthy goodness.
And if you’ll end up with a lot of it, you might want to consider learning how to dry kale leaves so you can store them for future use.
Easy Methods of Drying Kale at Home
Preparations for drying kale
Although there are many methods of drying kale leaves, the first thing you must do is clean it. Its leaves can hide dirt a lot better than other vegetables thanks to its curly anatomy so make sure to wash it thoroughly.
After washing, dry the leaves with a hand towel so it would be easier to dehydrate. You will also have to cut out the larger stems because they don’t really dehydrate well compared to the leaves.
Since kale leaves are a bit big, cutting them into smaller pieces is an option. You can then flatten them out on a tray to make drying kale a bit easier.
Air-drying kale
The most cost-effective way to dry kale leaves would be to hang them in a room with low humidity. Avoid directly exposing the leaves to the harsh rays of the sun as doing so will reduce their flavor and color under the said conditions.
Place a basin underneath the leaves so you have a catchall bin in case the leaves tear up.
While this method is the cheapest and most natural way of drying kale leaves, it is also the one that will take the longest time to do so – it may take weeks:)
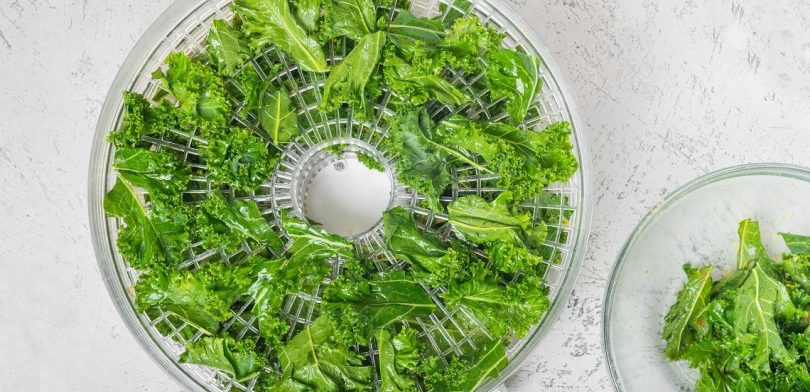
Trying kale in the food dehydrator
The best way to go about this is to use the good old dehydrator. It’s a device that helps remove the moisture from food to help preserve it.
- All you have to do is place the kale leaves on the tray, making sure that they’re evenly spaced out so they won’t bunch together, and put the tray in the machine.
- Set the temperature to around 125 degrees Fahrenheit (51-52 degrees Celsius) or if your dehydrator has a profile/mode for vegetables, go with that setting. Wait for 3 to 6 hours, but be sure to check the leaves every now and then to see if they’re drying to your liking.
Do not overcrowd the tray so that the leaves can dry properly. Also, the drying process will take longer if there are too many leaves on the tray.
Drying kale in the oven
If you don’t have the time to wait or you don’t have a dehydrator, carry out the drying process by putting the leaves inside an oven.
- The oven should be preheated to the lowest temperature possible or, at most, 140 degrees Fahrenheit (60 degrees Celsius). Place the leaves on the tray with baking paper and space them out evenly.
- From here on, it’s more of trial and error. The “baking time” is estimated to be anywhere between 15 to 30 minutes, depending on the oven’s lowest temperature. Repeat until the leaves are dry.
This method is a bit risky, and this is not as recommended as the previous two processes. But if you are left with no choice or are in a real hurry, just make sure that you constantly monitor the drying progress to avoid any accidents (and even prepare a fire extinguisher nearby).
How to Store Dried Kale
Now that your kale leaves are dry, it’s time to decide how you would like the leaves stored. You can do it as a whole (if you haven’t sliced it before the dehydration process), flaked, or powdered.
The most potent in terms of flavor would be to store it whole, but it would mean that you would need to place it in a large container and that may take up precious space in your kitchen or pantry.
Alternatively, you can slice or crush the leaves in various sizes to fit into smaller containers. Some choose to use a blender and turn the dried leaves into powder to maximize the storage capacity of the jar.
Speaking of containers, you can place the leaves (in whatever form) in an airtight mason jar for aesthetic purposes. This is good if you plan to use or dole it out in small quantities. However, keep in mind that exposure to sunlight will cause its flavor and color to deteriorate over time.
You might also want to choose a container that’s not translucent so that sunlight will not get in. This way, the flavor, and color will be preserved.
One thing to keep in mind is that kale becomes bitter over time if left at room temperature. It would be best to store it in the refrigerator, but make sure it’s isolated from other veggies or fruits to extend its freshness and keep it from wilting fast. Use an airtight, resealable zipper storage bag.
Kale is usually good for a week if stored properly in the refrigerator. But if you don’t plan on using it right away, another option would be to freeze it. Doing so will give you around 6 to 8 months of storage time, so don’t forget to mark the date when it was stored to avoid spoilage.
Indeed, knowing how to preserve and store kale leaves correctly is important. With this superfood’s many uses, you never know when you might need a pinch or so to add that kick of flavor in your meal. And because it is packed with a nutritional value higher than spinach, those who eat this curled vegetable will surely reap its many health benefits one way or the other.
Image: thespruceeats.com